Engine Modifications
Engine Beautification
Cockpit
Wheels
Tires
Suspension
Lights
Sound System
Exhaust System
Exterior
Return to the
Mods Page
Return to
Home Page


Index

COMPLETED
Enhanced ECU
"Plus Torque" Tuned Intake Manifolds
Magencor Ignition Wires and Bosch Platinum +4 Plugs
Twin Electric Cooling Fans
Removal of Air Pump and Air Rails
Removal of GM A/C Compressor
Removal of Cruise Control

Fuel Injection Harness Rebuild
Fuel Injection Hose Replacement

PLANNED
High Output GM Alternator
Electric Water Pump
100% Cold Air Induction
4-Speed GM700 Transmission
3.54 Differental
Twin Throttle Bodies (per bank)
Complete Engine Rebuild (Balance & Blueprint)

Engine Management Systems
Modification: Installed the AJ6 Engineering (UK) bolt-on kit consisting of:
  • Modified ECU (brings torque on sooner)
  • Dual-Intake Air Filter (w/Delco oil-based hi-flo filter)
  • Enlarged Throttle Bodies
All of these are available from AJ6 Engineering, UK (Roger Bywater). Much easier breathing...the engine used to run out of air at 5,200 RPM. It now pulls to redline strongly (6,400 RPM). Blips of the throttle rev the engine smoother and more quickly. The new air filter has a second intake hose on the back of the housing that attaches a flexible, aluminium covered heat-resistant air intake tube to below the front suspension, thereby introducing cold air into the engine. The increase in induction roar sound alone is worth it, and the increase of about 15HP is a nice side-benefit! I polished and detailed the enlarged throttle bodies before placing them on the car, and adorned them with the same gold-colored paint on top of them as the XKE cylinder heads. (It took me longer to detail and paint these throttle bodies than it did to install them!) Breathing is much improved with the larger throttle bodies and dual air inlet cleaners. When I installed these three items, I put the throttle bodies and air cleaners on first, then drove the car. I then added the modified ECU. The difference is felt when you "step on it". The engine releases the torque earlier, so you really feel it in passing, etc. Overall, this is a farily expensive mod (about $2,400 USD), but I think it is worth it. It is not an explosive increase in power (my engine now has about 30 more HP, up to around 312HP-- close to the 6.0 litre engine of 1995/1996), but the feel in day-to-day driving in real-world conditions increases my smiles-per-mile factor. Unfortunately, fuel economy has not gotten better, despite the claims by AJ6.

The "Torque Plus" Intake runners are my newest (as of 10/2000) modification to be added. Due to the nature of this mod, I had to take the car 'off line' for a while to install the intake manifolds as well as do my extensive Engine Beautification Project.


Engine Intake Manifold
xxx Modification: Installed the AJ6 Engineering (UK) "Torque Plus" Intake manifolds--customized, polished and powder coated. Effect: Much more torque (about 30 lb/feet) and about 20 more Horsepower.


Engine Ignition
Modification: Installed high performance 
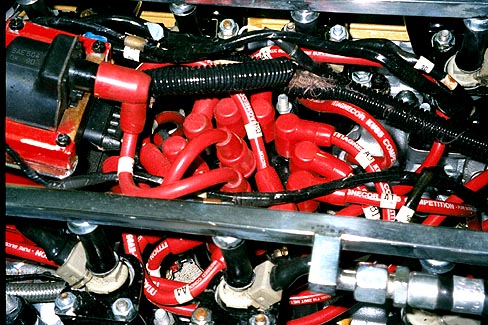
KV85 8.5mm spark plug wires and Platinum+4 spark plugs.
Effect: Much better idle, throttle response, and smoother running.


Cooling System
Modification: Installed twin thermostatically controlled twin electric fans by Flexlite available from Summit Racing at 800-230-3030 (part # FLX-210, @ approximately $200). These fans just fit on the XJ-S radiator for width and height, and will pull 5,250 cubic feet per minute of air. This is almost twice as much as the stock XJ-S mechanical fan. I removed the stock fan, fan belt, fan clutch, and shroud and installed this unit which was a complete unit with its own foam edged shroud.a I guestimate a 5-10 HP increase in losing the engine driven fan.

I installed these by taking radiator clamps, bending them flat so that the adjustment screw was accessible, then drilling two holes in towards each end. One hole in the clamp slips over each rod protruding from the top/bottom of the radiator to anchor there, and the other at a screw hole into the plastic radiator shroud. Tightening the clamps secured the fans very snugly against the radiator. All of this was done while the new radiator I installed was on my shop bench, so it was really easy to do. I do not think that installing the electric fans would be easily doable with the radiator in the car. (The old radiator was damaged when a cracked fan, in combination with a siezed fan clutch, which caused the fan to explode comin gback from a British Car show 100 miles from home, damaging the radiator and completely destroying the fan shroud--which saved the hood.)

I then installed the thermostat control box that regulates when the fans come on where the old relay was in the middle of the radiator top (which was now unneeded). On my 1989, there were two pre drilled holes on the radiator top plate that fortunately lined up perfectly with the two attachment holes on the rectangular control box. The box has a nob that you can adjust when the fans kick on at a given temperature. Be careful that you do not have it come on too early, because after the car shuts down, the fans will continue to run and drain your battery! Also this location made it perfect to wire the power from the box to the fans to the power wires on the fans directly below. The power wires (there are two of them, not just one) and the ground I ran along the top of the radiator and enclosed in plastic flexible cable sheath. Looks very neat and factory. Each power wire I connected directly to the back of the alternator. The factory electric fan wires and ground were not used.

Effect: Eliminates the after shut down 'heat soak' problem and keeps the engine consistantly cooler. Also, it is quieter than the stock fan and adds horsepower by eliminating the extra belt of the engine. One little annoyance, however, is the twin fans are slightly out of phase or balance, and you can feel and hear a pulsating buzz, when the car is at idle.


Air Pump
Modification: Removed the Air Pump, belt, and air rails. Effect: Added an extra 5-10+ HP due to lack of extra engine crank pulley drag. This mod and the electric fan (above) allowed me to get some spin from the rear tires from a standing start plus a lot more kick in the pants around town and on the road.


Air Condition Compressor
Modification: Removed the factory GM Air Condition Compressor Pump, belt, and miscellaneous hardware. Effect: Added an extra 5-10 HP due to lack of extra engine crank pulley drag. It also makes the front of the engine very visible. Not to worry--I plan on replacing this with a smaller more efficient Sanden or Vintage Air AC Compressor that will mount where the old Air Compressor was (next year when it gets hot). In the mean time, it is nice to enjoy the "free" HP increase and to view the magnificant V12 engine for the first time.


Cruise Control
Modification: Removed the stock Cruise Control bellows in the Vee of the Engine. Effect: Visually clean up the center of the Vee of the engine. The stock unit is way to big, bulky, broken, and ugly. I plan on eventually replacing it with a more modern electrically controlled unit (I do like cruise control, but would rather have the cosmetic benefits for now). However I do eventually plan on replacing it with an electronic cruise control. My brother in law found a cruise control unit at Pep Boys for around $175 for his Porsche 914. It is very small and looks like it could be mounted under the dash. Check back for details.


High Output GM Alternator--Planned
Modification: Replace the stock Lucas unit with the kit from John's Cars Effect: Gain the extra current needed to drive the new Electric Water Pump as well as the larger stereo system, and high output driving lights.


Electric Water Pump--Planned
Modification: Replace the mechanically driven water pump with a higher output electrically driven water pump unit from Australian built Davies-Craig Effect: Increase engine efficiancy and Horsepower by eliminating yet another crank driven belt, eliminate engine ancellary noise, and especially provide even better running and shutdown cooling capabilities. Even with the twin electric fans (see above) the high underhood temperatures of the engine have been greatly reduced. The electric water pump will completely elminate 100% of hot shutdown heat sink by running the water pump, like the fans, after engine shutdown. Therefore, water will be cooled and flowing through the block even when the engine is not running. I have alrady purchased this unit, but am waiting to install it after installing the high output alternator that will drive it. I am also having a special coupler modified on the water pump assembly that will allow a shorter belt to bypass the (to be) non useful water pump pulley (while also saving on uneccessary drag). Currently, the line between the power steering pump and crank is blocked by a protruding part of the water pump. However, I have fabricated a triangular shaped aluminium plate to blank over the existing down hose inlet to the water pump housing. The replacement (gutted) housing will have the water inlet in the hole vacated by the original water pump pulley and impeller.


100% Cold Air Induction System--Planned
Modification: Replace the twin input AJ6 air cleaners (already a mod!) with carbon fiber tubing fed from twin K&N filters in behind the front grill. Effect: Increase engine breathing and efficency (and Horsepower), and clean up the appearance of the engine compartment. The underhood of the engine bay has very high temperatures. Generally speaking, lower air temperature equates to more condensed air which equates to more HP. I have also been inspired by the designs of Ferrari, Viper, and Lamborghini in this regard. It seems to me very inefficient to suck the air into the air cleaners and then "slam" it into a filter--as is the current design for the XJ-S. Instead, these other high performance cars filter the air first, then allow it to accelerate through the throttle bodies into the engine. The fact that this is an accepted practice on high end, big dollar engines encourages me to emulate this through a 'monkey see monkey do' form of reverse engineering. I have located a company in North Carolina that is now fabricating the very beautiful custom fiber tubing, and I am trying to figure out how to machine all the other hardware. It will be plumbed through holes that will be drilled behind the headlights. Twin conical K&N filters will mount in the area in front of the radiator.


4-Speed Automatic Transmission--Planned
Modification: Replace the 3-speed GM 400 automatic transmission with the GM700 4-Speed Automatic using a conversion kit by John's Cars If you have not visited this page recently, this is a change. I originally wanted to go to the Keisler Engineering 5-Speed Tremac conversion, but three things changed my mind:

  1. Cost: The kit from John's Cars and a rebuilt transmission kit are a lot less expensive then the 5-Speed from Keisler
  2. installation: I could do this one myself. The 5-speed conversion from an automatic seems a little too much for me
  3. Convenience: I use my XJ-S as a daily driver and can be in and out of heavy traffic. The performance benefits I'd get from the 5-Speed would be so infrequent (some club racing, slaloming, a very little track driving) that I'd rather have the day-to-day ease of ownership of the 4-speed auto box.
Effect: Greater off-the-line and 0-60 performance. The stock tranny first gear is way too high. I can pull 64MPH in first! Combine that with a 4,200 lb car, and I've been dusted at a stop light by an LOL (little old lady) in a Cadillac STS! NOT good!! A lower first gear, and more gears are what this car desperately needs. If an auto-box is to tame for you, Keisler is a great guy and I have driven one of his 5 speed conversions. Highly Recommended!


3.54 Differential-Planned
Modification: The stock 2.88 rear differntial in combination with the stock Gm44 transmission gearing is the primary reason for high performance acceleration with the magnificant Jaguar V12 engine. Combine this with a 4,000+ pound curb weight and poor performance is a result. To remedy this, I'll be installing a 3.54 ratio differential, and perhaps even a 4.11 if I also decide to go with the Gear Vendors overdrive unit. This is a small module attached to the rear of your transmission that provides a .83 ratio off of any gear out of the transmission. Since it is in line between the transmission and the differntial, it essentially doubles the number of gears you have available. Therefore my new 4 speed becomes an 8-speed. If I choose to install the 4.11, very low 'hole shot' ratios would be available. Effect: Yes, acceleration is good. It's all about weight (can't do much about that on the XJ-S), Gearing, and Torque. The result should be much better acceleration and lower cruising RPMs.


Dual Throttle Bodies--Planned
Modification: Modify the (already modified AJ6) intake manifold to connect two throtle bodies per side. Effect: Even more increased breathing of the engine and HP increase. I was inspired to do this for a few reasons. First, despite all the goodies I've already done to this car, I still want more power! (See next planned modification below) Second, Shafi Keisler of Keisler Engineering offers such a product, and if he does, it must be worthwhile. Also XJ-S list (jag-lovers.org) member Chad Bowles has done the same with impressive results. Lastly, I was at the JCNA 2001 Challange (just last weekend as I write this Aug 2, 2001) and saw a fellow who did his own. Once I saw that, I figured I could do better. He cut the plenium open and welded a 1/2 inch aluminium plate to it with two intake holes for two throttle bodies (and the associated bolt attach holes for the throttle bodies). It was crude be effective. My plan is to take my old set of stock air intakes and experiment on them by getting them cut open in a machine shop, then have a plate to mount the throttle bodies made up to bolt (not weld) into the intake manifold. I think it would a) look a lot neater than the bead of the weld and b) protect my investment in the detailed throttle bodies I have now by not destroying the powedercoating due to the heat of the welding. Again, stay tuned! I'll most likely do this mod in 2002. Also, for anyone interested out there, I will offer my experimental but completed dule intake manifolds for sale to anyone that might be interested. Just let me know!


Engine Rebuild--Planned
Modification: Due a crank up rebuild of the engine with Titanium connecting rods, flowed and reworked heads, higher lift cams, uprated valve springs, balanced and blueprinted engine, electromotive engine management system, and powdercoated engine block. Effect: Hopefully, to reach my ultimate goal of having the highest naturally aspirated Jaguar V-12 in the world (class, can we say together, "WORLD DOMINATION" ;-). O.K., so I've lost my marbles (well, not all of them exactly), but it is an obtainable goal. I am estimated with all of the above that a reliable and driveable 450 BHP Jaguar V-12 engine is possible. Remember that my ultimate of ultimate of goals is to maintain the Jaguaresque qualities that make this automobile such a marvelous driving experience. Of course, I could put on NOX, turbos, or two massive superchargers like my friend Bradley Smith (650+ silky smooth HP!), but that is not the point. I want to push the V-12 engine to what it could become with the care and planning that Jaguar Cars would have applied if they could.